
Picture of the Week
| |
Picture of the Week |
30 Dec 2012
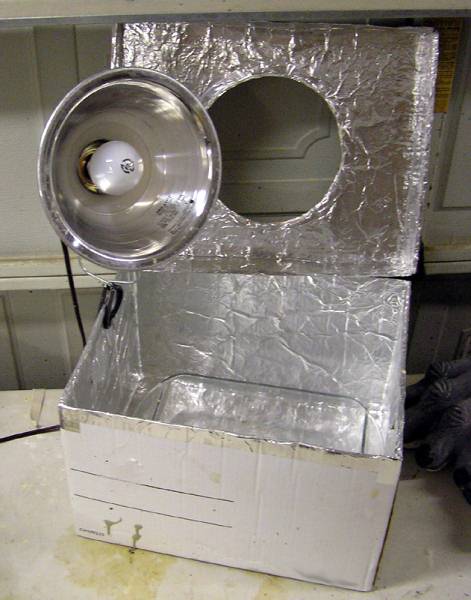
One of the most useful DIY tools in the workshop - a metal-tape lined box for heating up and softening oil-based clay. This simple box saves a ton of time when sculpting.
Location: The Workshop
23 Dec 2012

Here's Lance Pope in a repainted Boris back in 1992. This was taken while working for an independent 16mm film (shooting title "Verdun Manor", finally renamed "Sign of the Werewolf," produced by Randy Neely and directed by Harry Keane - they approached Lance with the idea).
Location: A movie location in Texas
16 Dec 2012
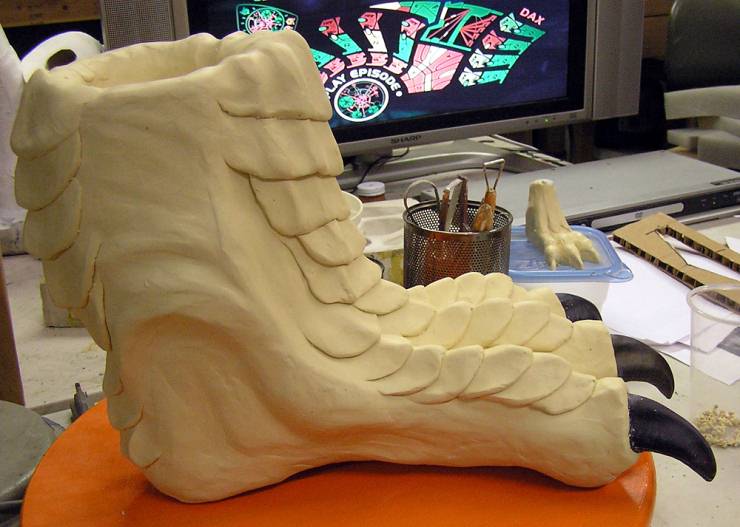
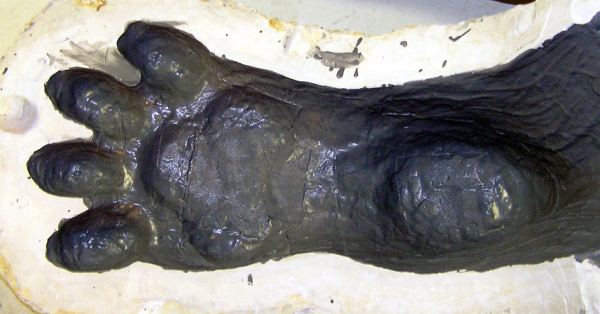
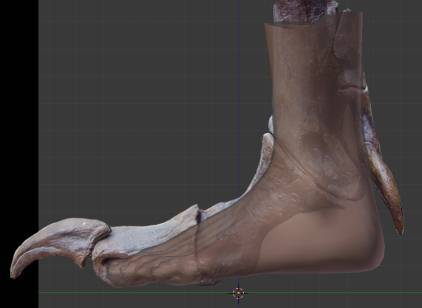
A side shot of one of the dragon feet sculptures. In the background is the rough maquette that was the starting point.
Location: The Workshop
09 Dec 2012
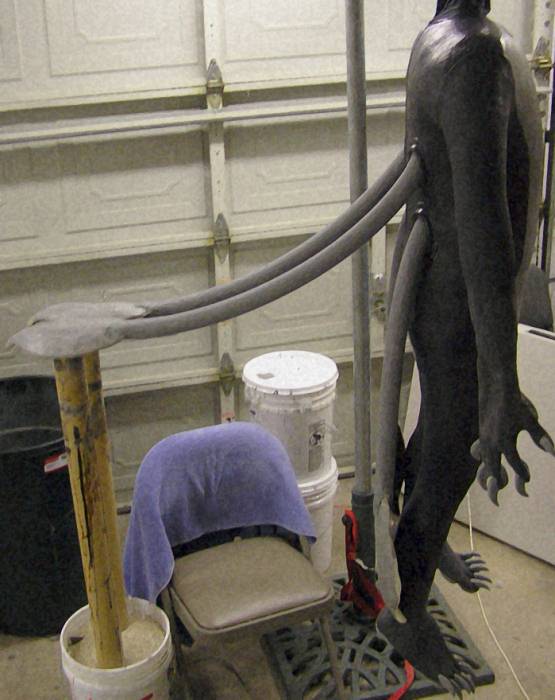
Rearranging the storage area in the workshop presented Ysengrin with this unposed shot.
Location: The Workshop
02 Dec 2012

The big overlapping scale plates for the front have now been added. This is just the start of the finer detailing. There are more large scales for the back of the foot, some medium overlapping scales to add, and a whole bunch of smaller scales. Ysengrin made three quick press-type molds to make the individual scales used since the scales were too big to uniformly cut from a roll of clay.
Location: The Workshop
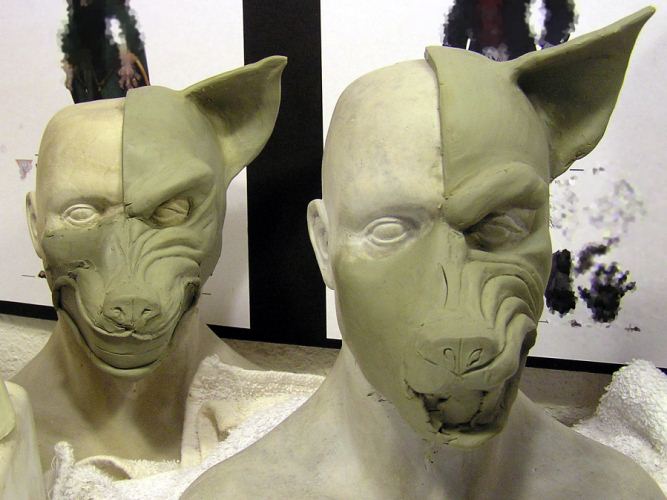
25 Nov 2012

Now the dragon feet have been given their base shape. They've been made a bit taller (about 11") and the underlying forms have been better defined.
Location: The Workshop
18 Nov 2012

Here, Ysengrin is starting on the buildup for the dragon feet sculpture. There's a lifecast of a large - size 14 - pair of dive booties being used as the core of these sculptures. At this point, there is only the suggestion of the shape of the finished feet. Those are also the test claws from last week being used.
Location: The Workshop
11 Nov 2012
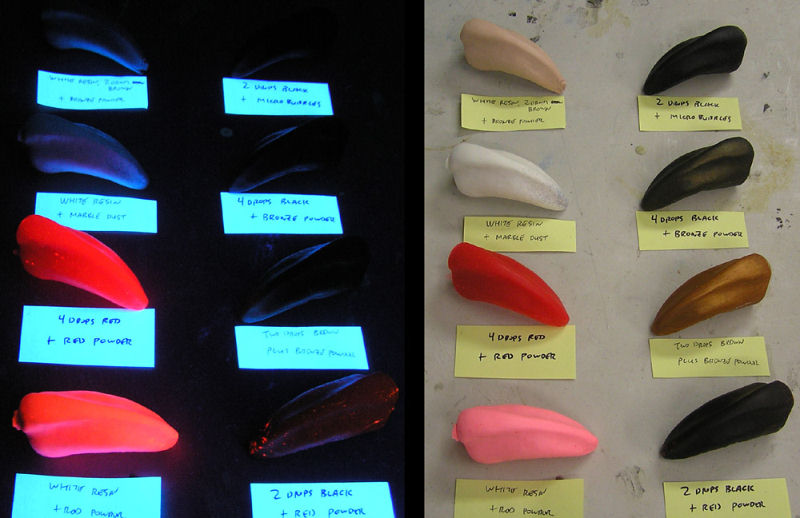
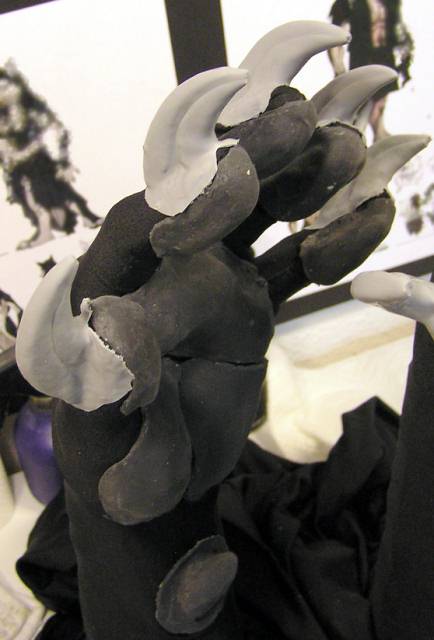
Ysengrin needed to make a run of dragon claws to use in the sculpt of the new dragon feet, and took advantage of not needing a color-matched set to experiment with various additives, including uv reactive powder. The black and bronze claw in particular looks like it will be a popular choice. Normal light on the right, uv on the left.
Location: The Workshop
25 Aug 2012
Apologies in advance for the cluttered image. This is an in-progress photo of a creature body suit showing off the back tentacles. This creature was delivered to the new owner last weekend.
Location: The Workshop
18 Aug 2012

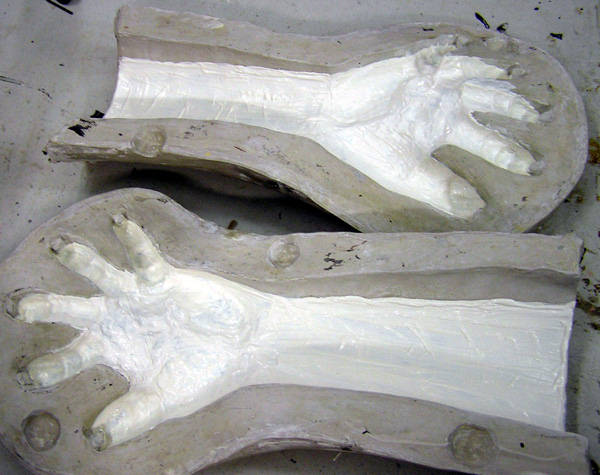
This is the other-handed paw from the same project as last week, just farther along in the process.
Location: The Workshop
11 Aug 2012
In-progress photo of a non-lycanthrope paw, built up on a spandex base. It will be skinned with latex when finished, embedding the pads and the claws. This particular project is DarkFang's work.
Location: The Workshop
04 Aug 2012

These claws might look hard, but they're cast with expanding flexible foam.
Location: The Workshop
28 Jul 2012
This is looking into a paw bottom mold with heavy reinforcement -- for heavy use, naturally.
Location: The Workshop
21 Jul 2012
Here we're running brightly colored latex in a set of molds. For special markings, the latex is painted into the molds before the molds are assembled.
Location: The Workshop
14 Jul 2012
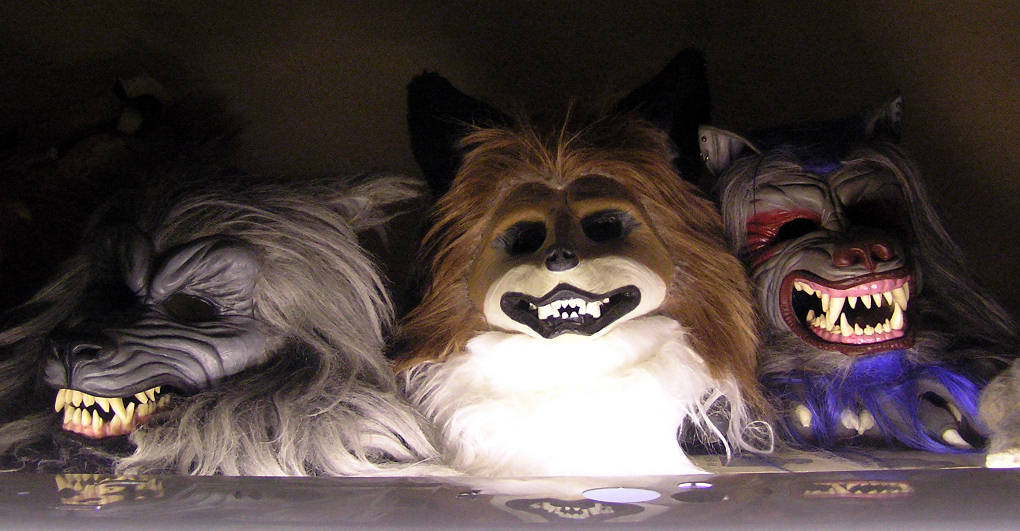
Alternate designs of werewolf head maquettes.
Location: The Workshop
07 Jul 2012
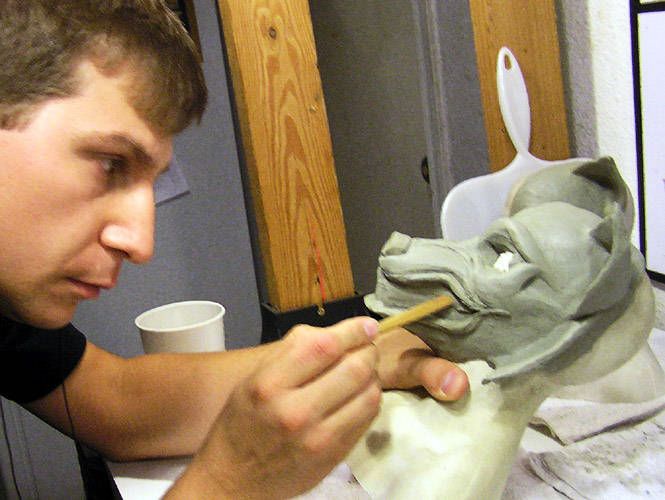
DarkFang sculpting on a set of werewolf head maquettes.
Location: The Workshop
30 Jun 2012
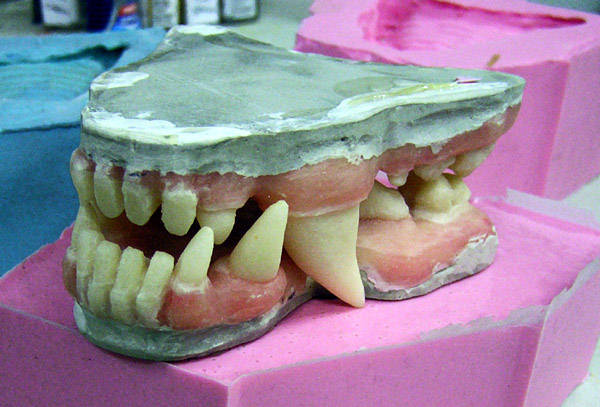
A new jawset, based on the old Fox jawset. That's the masters, a fresh cast out of the old fox molds that several teeth were ground away then new teeth sculpted by hand with dental acrylic in their place. They're filled with plaster to make the masters easier to handle and cast.
Location: The Workshop
23 Jun 2012
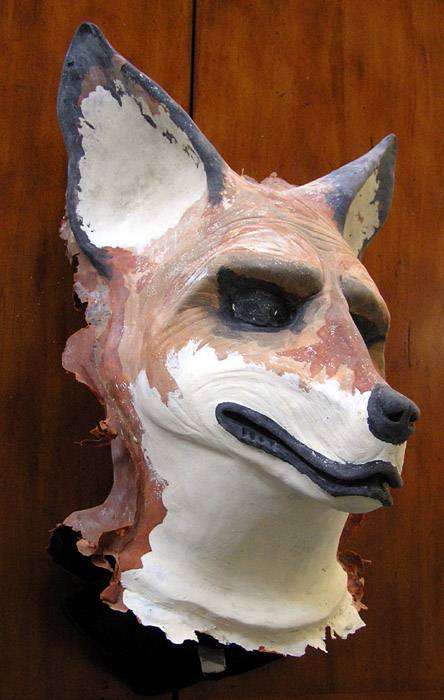
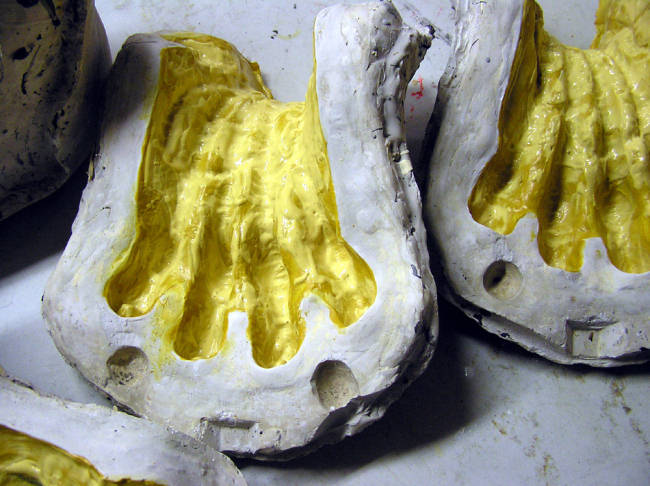
Here's a fox head, freshly pulled from the mold, before the flashing from the mold seam was removed. The colors you see are cast into the latex - think of them as a suggestion of the the markings the final airbrushing will have.
Location: The Workshop
16 Jun 2012
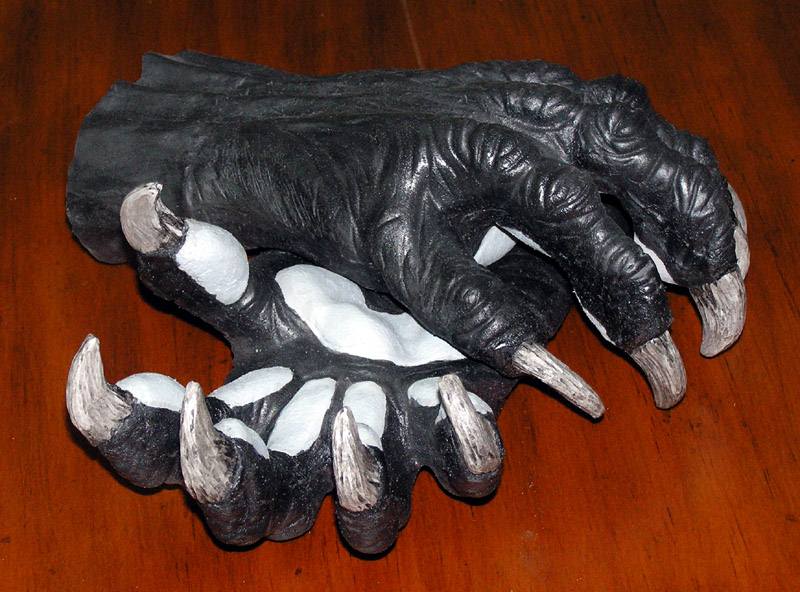
A set of black and grey werewolf paws.
Location: The Workshop
09 Jun 2012

Yeah, it was something like that ... one of Shawn Thorsson's suits of Halo armor, wandering around the Faire.
Location: 37° 32' 52" N, 122° 18' 07"W
02 Jun 2012
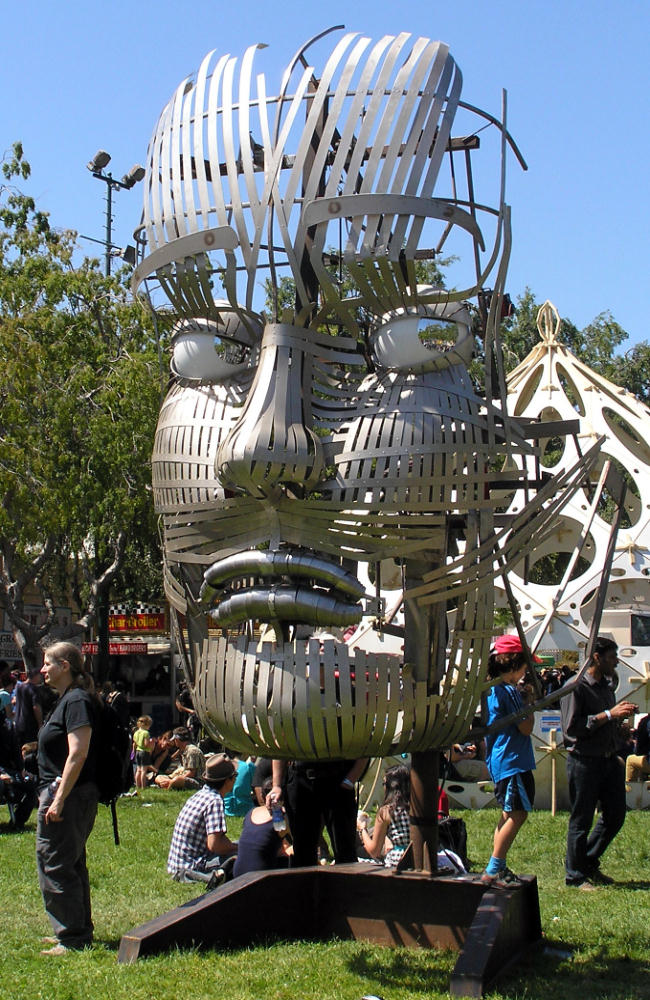
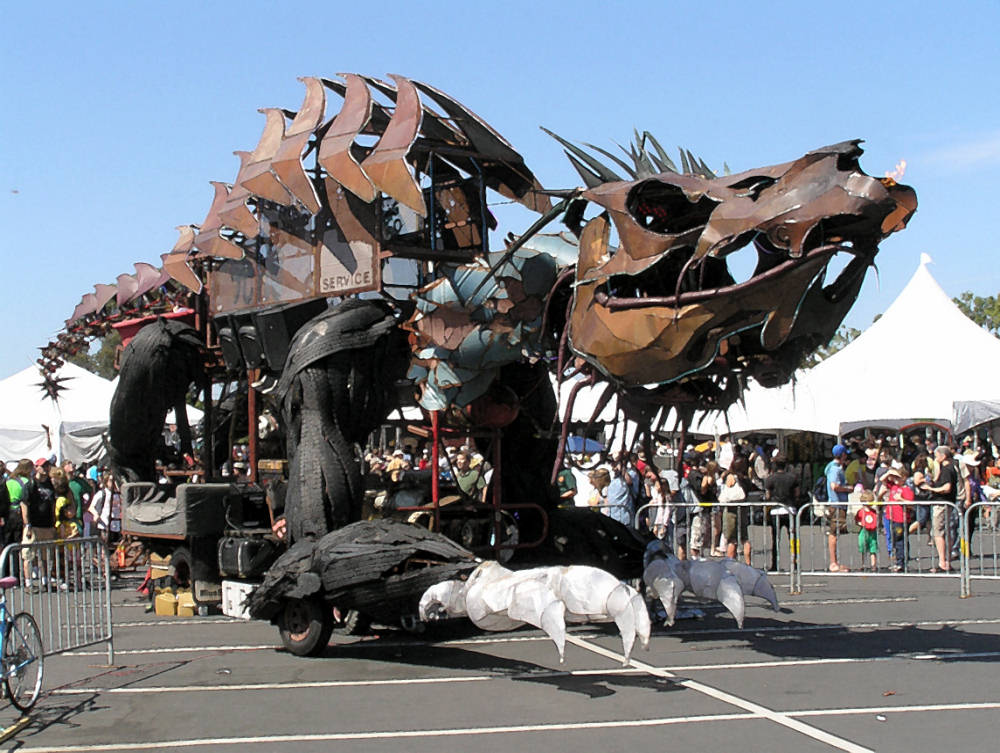
Yeah, it was something like that ... Face Forward by artist Christian Ristow. It's a 12-foot-tall robotic human face whose performance is guided by audience participation. Look close - the pupils are mirrors.
Location: 37° 32' 52" N, 122° 18' 07"W
27 May 2012
20 May 2012

Yeah, it was something like that ... Brollyflock by the Flux Foundation.
Location: 37° 32' 52" N, 122° 18' 07"W
13 May 2012
Here's the final two-part mold (using Mold Max 30) of that base plate, just after opening the mold with a casting in place. The two tabs coming off to the right side of the casting are a pour hole and a vent hole; that edge would normally be the top of the mold when it's in use.
Location: The Workshop
06 May 2012
You need to not be afraid to fail when trying something new - this is why. We found that the one piece mold suffered from two problems. First, the mold had to be absolutely level for a good cast, as the whole bottom of the plate was open in the mold and that surface needed to be level in the pulled copy. This proved to be more finicky that we'd expected, and would have slowed down the production of the plates. Second, the plate was too thin for the casting resin we were using, and was too fragile to demold in one piece.
Ysengrin went back and remolded the base plate as a two piece mold after adding a piece of foam board to the bottom. The extra thickness, as long as it was consistent, would not be an issue in how we would use the casts.
Location: The Workshop
29 Apr 2012
At first, we molded the base plate as a one-piece silicone mold. This photo shows the setup just before adding the silicone. The base plate was attached to a sheet of paper with rubber cement, and the paper taped down on the cardboard base. This is how we make most of our jawset molds.
Location: The Workshop
22 Apr 2012
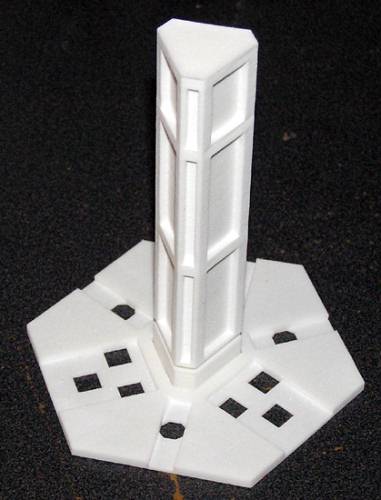
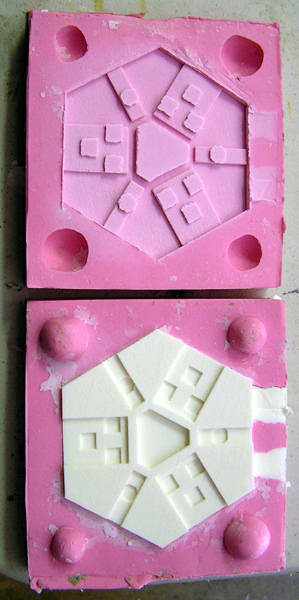
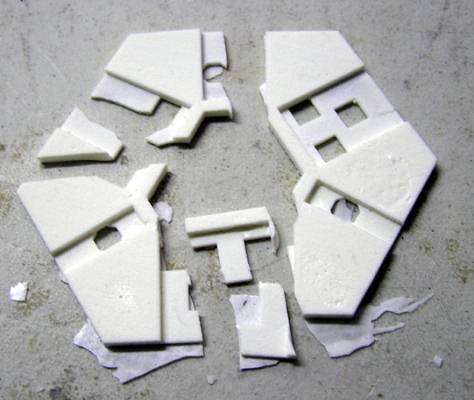
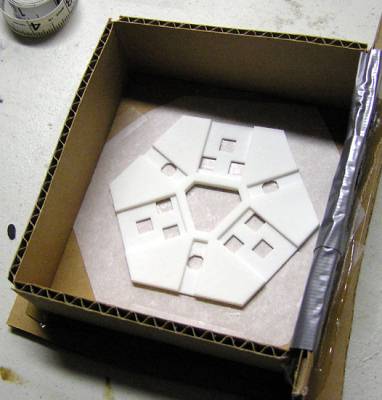
This is a master architectural model that was roughed in with Sketchup, cleaned up in Blender and printed via Shapeways. We'll be making molds of both pieces and making multiple copies for our internal use.
Location: The Workshop
15 Apr 2012

This is a casting test for new materials. In this case, we made a single paw with Dragon Skin Pro to test techniques of casting the silicone and the durability of the finished paw.
We will be offering silicone paws and heads when we're satisfied with how the finished product performs.
Location: The Workshop
08 Apr 2012
Here's the *second* step in designing new feet. The first step is a set of rough sketches and doodles to get an idea of what we want to make. It's followed up with a composite like this image, so the (supposed) internal structure of the creature's feet will make some sense.
More on these later, when the maquettes are done.
Location: The Workshop
01 Apr 2012
With the pads finished we now paint in the palm color. As you see, the palm color overlays the pad color. When the two or three layers of palm color are laid in, one layer of the main skin color is laid in. Once that's skinned, fiber reinforcement is added at the high flex points between the bases of the fingers. Then the molds are assembled and we run the main skin color as a normal slush casting.
Location: The Workshop
25 Mar 2012
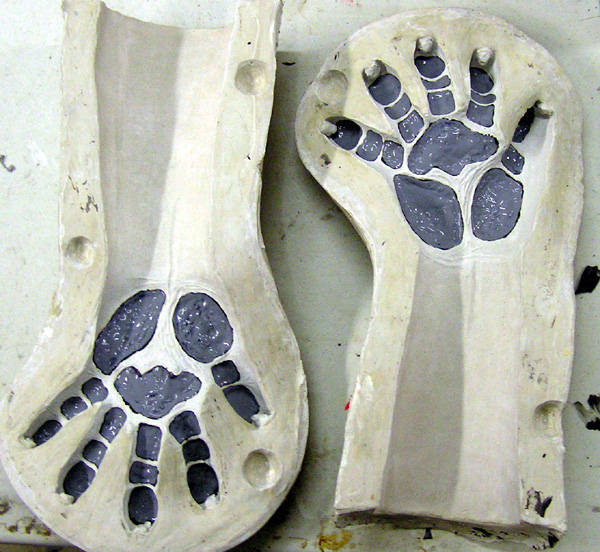
We use colored latex in our paws, so as they wear they rarely need to be touched up. That means we have to make them from the outside in, even though they're cast in molds. Here, we've painted in the black latex for the pads in a set of wolf paws. Normally, we'll lay down three layers for the pad color.
Location: The Workshop
18 Mar 2012
Here's the finished silicone mold from last week - a successful test. We were using this mold as a chance to try out a new silicone we hadn't used before.
Location: The Workshop
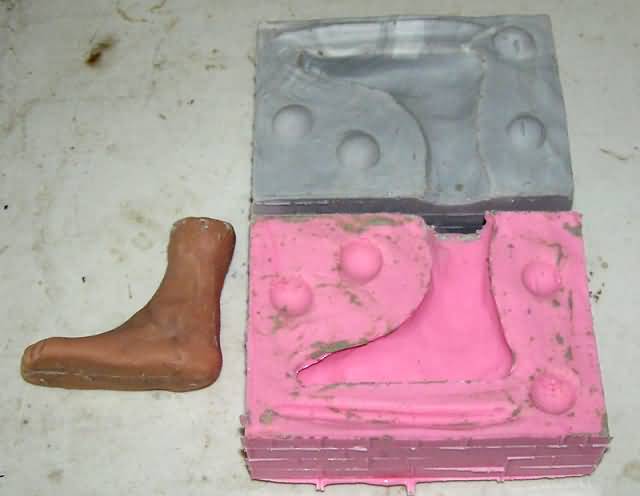
11 Mar 2012
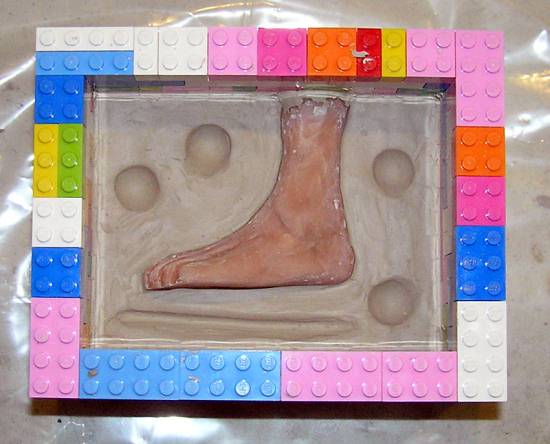
That's a super sculpty foot maquette that's been around the shop for a while, and we thought it would be nice to have a few copies so we can work up new paw designs. This photo is at the start of making a two part mold. A box has been made out of Lego™ blocks and half-filled with water based clay. The foot was then embedded halfway, and the top of the maquette sealed to the box with more clay. A glass marble was used to make registration keys in the clay, and as an experiment, a long trench was cut into the clay as an additional alignment key. Exposed surfaces were brushed with mold release in anticipation of the silicone.
Location: The Workshop
04 Mar 2012
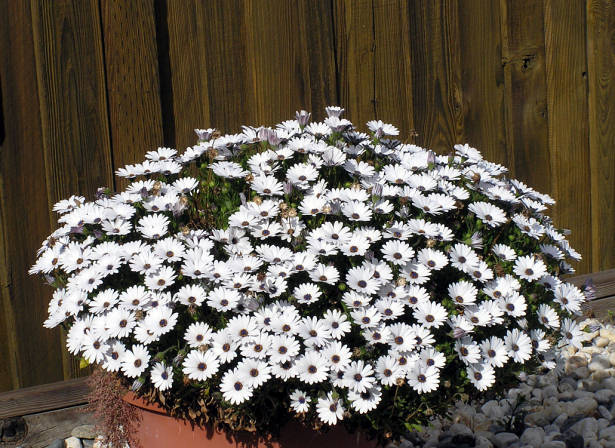
Spring is enthusiastically greeted by the Osteospermum in the garden. It's a little early, but we have quite a mild winter here normally, and this year has been warmer than usual. A larger version (379k) of this image is also available.
Location: The Workshop
26 Feb 2012
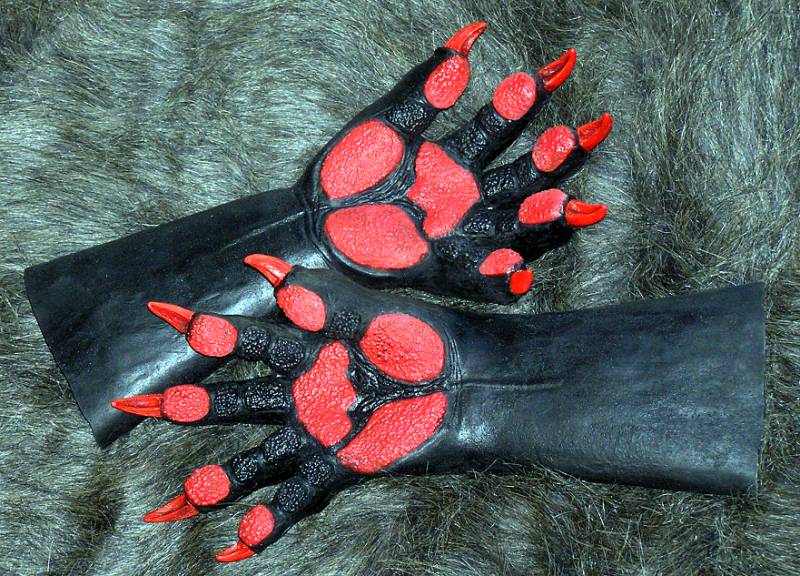
Black and red forepaws for a client; these were replacements when his first pair wore out.
Location: The Workshop
19 Feb 2012
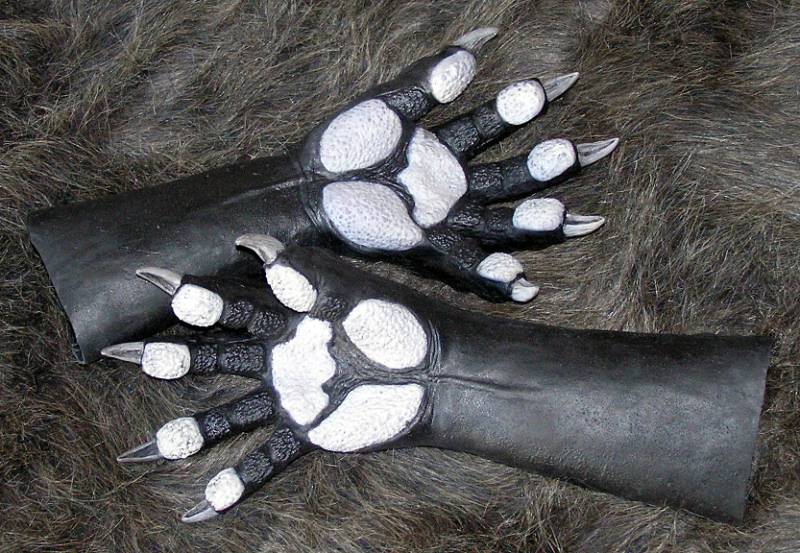
The matching set of black and grey forepaws for a client.
Location: The Workshop
12 Feb 2012
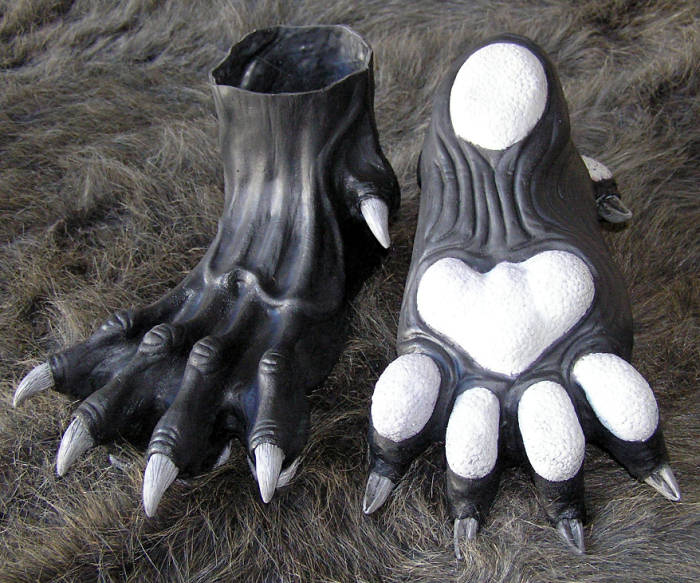
A set of black and grey hindpaws for a client.
Location: The Workshop
05 Feb 2012
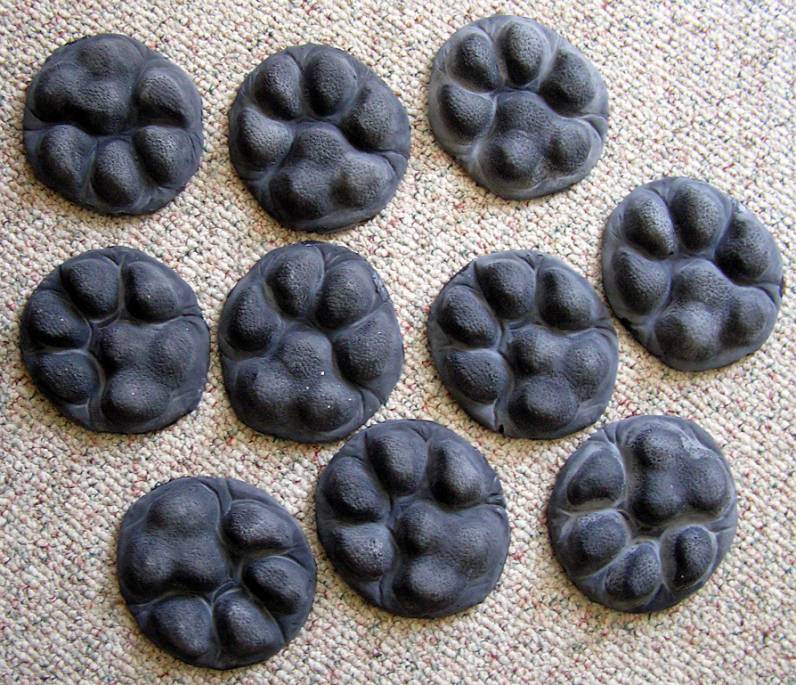
A batch of canine pawpads for a client.
Location: The Workshop
29 Jan 2012
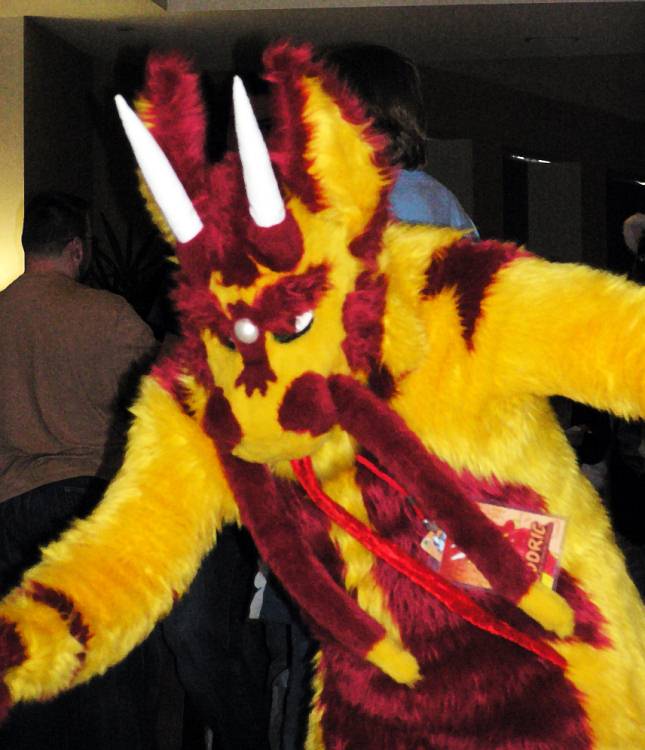
Godric, taken during Further Confusion 2012.
Location: Somewhere in California
22 Jan 2012
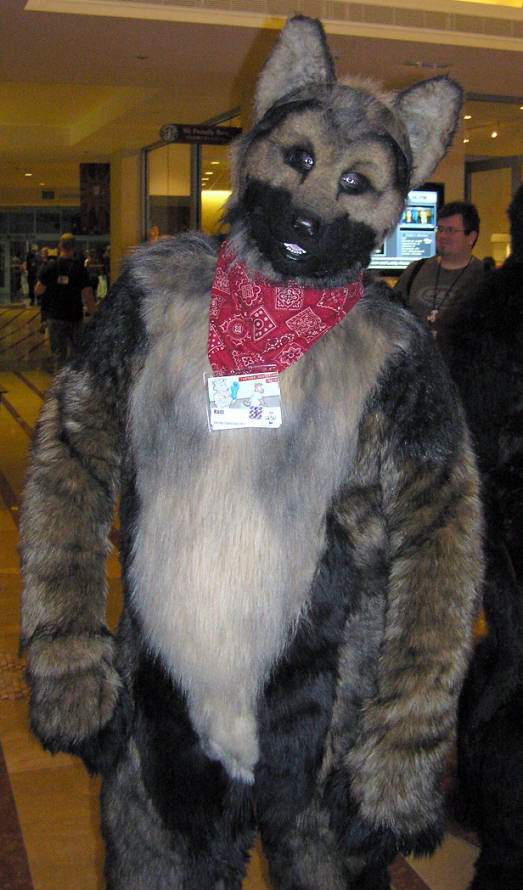
Kodi, taken during Further Confusion 2012.
Location: Somewhere in California
15 Jan 2012
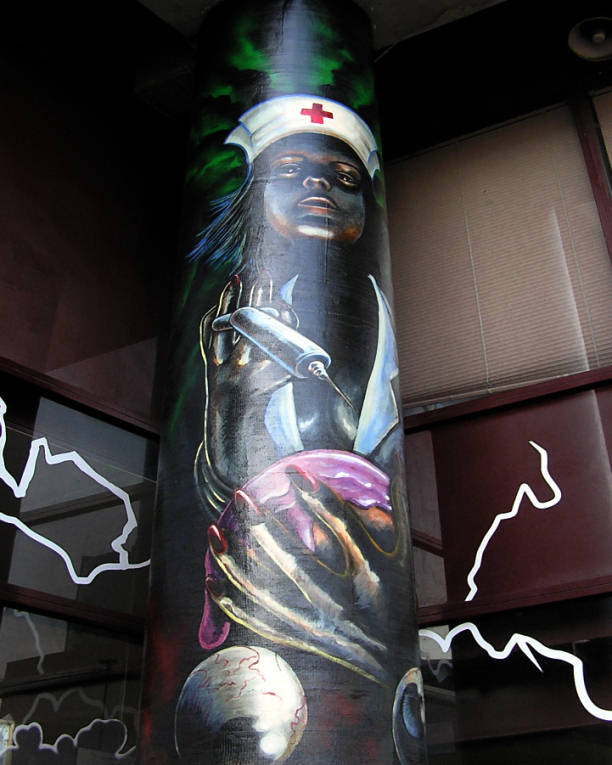
The Psycho Donuts nurse, downtown San Jose, California. Taken during Further Confusion 2012.
Location: Somewhere in California
01 Jan 2012
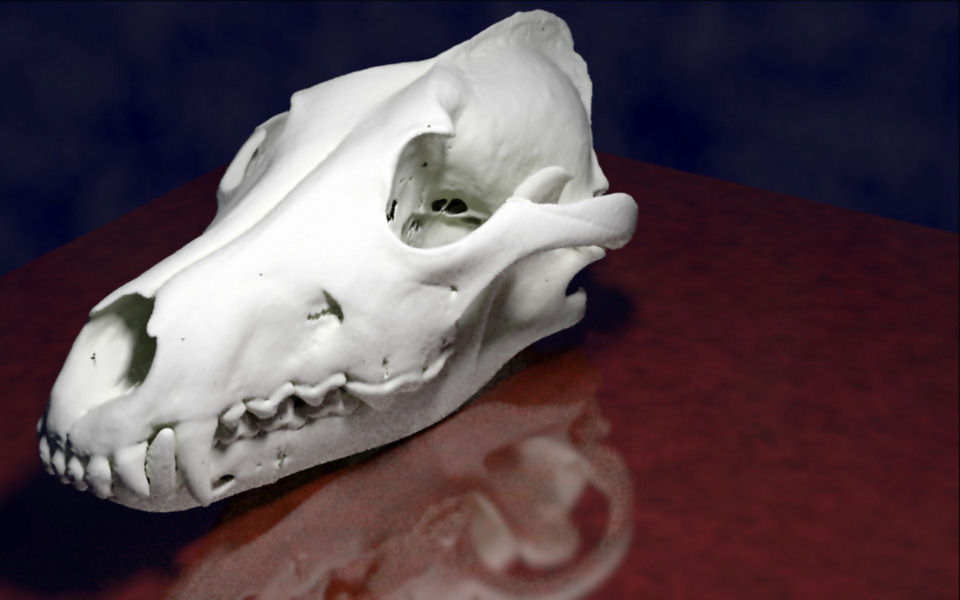
Just a test of an in-progress 3D model of a wolf skull. We decided that we needed an accurate digital model of the skull for several projects, so Ysengrin started in on it. Proportions are based on an actual skull.
Render done in Blender/Cycles with simple materials.
Location: Somewhere in California
